A Christmas tree stand is an essential part of holiday decorating, providing the foundation that keeps your treasured tree upright, secure, and hydrated throughout the season. While many stores offer ready-made stands, Make a Christmas Tree Stand can be a rewarding and customized solution, especially for those who want to accommodate unique tree sizes or enjoy a hands-on holiday project.
This detailed article explores how to make a Christmas tree stand, covering the essential components, materials needed, construction steps, safety considerations, and tips for maintaining a healthy and stable Christmas tree setup.
Why Make Your Own Christmas Tree Stand?
-
Customization: Tailor the stand to fit the exact size and shape of your tree, ensuring stability.
-
Cost Efficiency: Building a stand can be more economical than purchasing high-end commercial models.
-
Unique Aesthetic: Craft a stand that complements your holiday décor with personalized design or finishes.
-
Sustainability: Using recycled or natural materials promotes eco-friendly decorating.
Essential Features of a Good Christmas Tree Stand
Any Christmas tree stand must fulfill critical functions:
-
Stability: Securely anchor the tree, preventing tipping or wobbling.
-
Water Reservoir: Hold sufficient water to keep the tree hydrated for weeks.
-
Ease of Use: Allow straightforward tree insertion, adjustment, and removal.
-
Durability: Resist rust, cracks, or warping during the season.
-
Safety: Minimize fire hazards and accidental spills.
Materials Needed to Make a Christmas Tree Stand
-
Base Material: Durable wood (plywood, hardwood), metal, or heavy-duty plastic.
-
Support Mechanism: Screws, bolts, or clamps to hold the trunk upright.
-
Water Reservoir: Plastic or metal basin/insert to contain water.
-
Tools: Saw, drill, screwdriver, clamps, measuring tape, sandpaper, paint (optional).
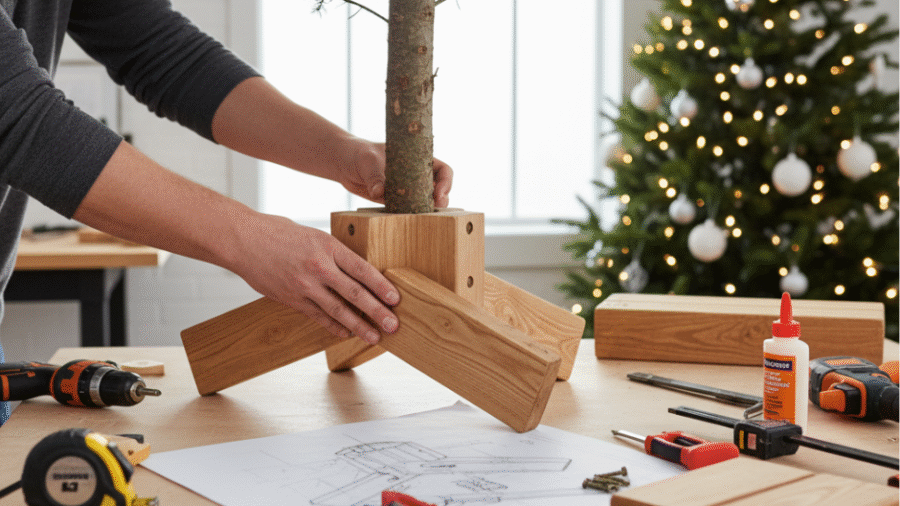
Step-by-Step Guide to Building a Wooden Christmas Tree Stand
Step 1: Measure Your Tree Trunk Diameter
-
Determine the widest part of your tree’s base to size the stand accordingly.
-
Add extra clearance for placement and securing mechanisms.
Prepare the Base
-
Cut a square or circular wooden base about twice the diameter of the trunk for stability.
-
Sand edges smooth.
-
Optionally, paint or seal the wood to protect against moisture.
Create the Water Reservoir
-
Use a plastic or metal container slightly smaller than the base.
-
Attach securely to the base to prevent movement.
-
Ensure the reservoir is watertight.

Design the Holding Mechanism
-
Insert adjustable screws or bolts around the center hole of the base to press firmly against the tree trunk.
-
Alternatively, construct a clamping system with bolts and metal straps to secure the trunk.
-
Ensure uniform pressure to avoid damaging the bark but hold the tree upright firmly.
Assemble the Stand
-
Drill a central hole in the base for the tree trunk.
-
Attach the water reservoir beneath or inside the base with waterproof adhesive or screws.
-
Install the securing bolts or clamps through pre-drilled holes around the central opening.
Test Stability and Water Fill
-
Insert the tree trunk, tighten the securing bolts gently but firmly.
-
Fill the reservoir with water.
-
Confirm the stand holds the tree upright without wobbling.
Alternative DIY Tree Stand Ideas
Bucket Stand
-
Fill a sturdy bucket with heavy materials like sand, gravel, or concrete.
-
Place a PVC pipe or metal tube vertically, secured in the fill material.
-
Insert the tree into the tube and fill with water.
Concrete Stand
-
Use a bucket or mold.
-
Pour quick-setting concrete with a vertical pipe or sturdy support.
-
Allow it to cure then insert the tree.
Metal Frame Stand
-
Use metal rods welded or bolted into a base plate.
-
Incorporate adjustable clamps or bolts.
-
Coat with rust-resistant paint.
Tips for Using Your DIY Christmas Tree Stand
-
Always keep the water reservoir filled to prevent drying.
-
Regularly check and tighten securing bolts.
-
Avoid placing the tree near heat sources to reduce water consumption.
-
Clean the stand and reservoir after the season ends to maintain longevity.
Safety Considerations
-
Use waterproof materials to prevent leaks and potential floor damage.
-
Avoid sharp edges or protrusions that can cause injury.
-
Ensure the stand is sturdy enough for your tree’s height and weight.
-
Keep the area around the stand dry to prevent slips or electrical hazards near lights.
Read More: When Should You Put Up Your Christmas Tree? Timing Your Tree-Trimming Tradition for Maximum Holiday Joy
Conclusion
Make a Christmas Tree Stand allows for a secure, functional, and personalized base that enhances both the safety and aesthetics of your holiday décor. With basic materials and tools, a little effort can create a durable stand that meets your tree’s needs perfectly.
By following this step-by-step guide with attention to stability and hydration, your Christmas tree will shine brightly and safely throughout the festive season.
Add a Comment